OLD METHOD - Mainly still used for CS5/CS6: This tutorial covers the old method for recovering a green jersey. This method is still soemtimes needed for CS5/CS6. Howevr, it should never be needed for CC 2018 or higher. The newer methods can be found HERE.
There are 2 different methods for working with an image with green areas. First there is an automated foreground recover adjustment in EZ Green Screen. This will work well for green areas that are not really close to a true chroma key green. Generally, green areas that have a hue of less than 90 or more than 150 can possibly be recovered with the foreground recover slider in EZ Green Screen. However, green hues that are between 90 and 150 are too close to chroma key green and require manual selection.
Making Selections Inside the keep and remove areas menu, there are 2 sections. The upper section is the selection tools. You will use these tools to make selections for areas that you want to add back into the foreground.
For areas that don't directly border the green screen, it is easiest to use the lasso or polygon lasso tool. Simply lasso around the area that contains the green. The selection doesn't need to be precise. You can also include other non green areas in the foreground. Just be careful to not include areas of the green screen in the selection.
For areas that border the green screen, the selection needs to be more precise on the edge. For this, you will want to select the original image for the preview. This allows you to see where the selection edges need to be. The quick select and magic wand are best for selection near the edges.
Adding area to the foreground: The bottom section in the Keep and Remove areas menu has several options for what to do with the selection. For a green area that you are trying to keep, you'll want to use the option called "Add to FG - No Spill Correction".
OLD METHOD - Mainly still used for CS5/CS6: This tutorial covers the old method for recovering a green jersey. This method is still soemtimes needed for CS5/CS6. Howevr, it should never be needed for CC 2018 or higher. The newer methods can be found HERE.
If you are trying to extract an image with a chroma key green colored shirt, it will initially be extracted. There is no green screen software in the world that can extract an image like this with a single click.
However, with EZ green Screen, it is pretty simple to manually select the area to keep. Best of all, the rest of the image will maintain the green spill correction and clean edges.
The image below is normal for what the initial extraction will look like. EZ green Screen does not actually remove the foreground. The software uses layer masking for both transparency and spill correction in a non destructive manner. Scroll down below to see the easiest way to add the shirt back into the foreground.
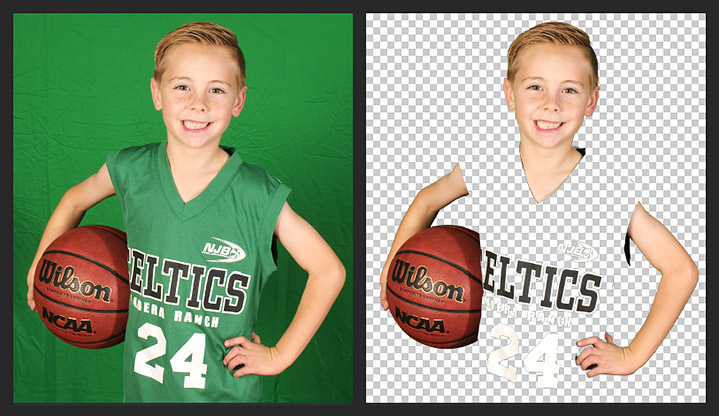
First, you will need to go into the "Keep and Remove" are menu in EZ green Screen.
It is often easier to make the selections in several steps instead of selecting everything at once. For a shirt, a good method is to break it out into 5 selections. The first selection is to add most of the shirt back but not get too close to the edges. For the remaining 4 selections, you can divide the shirt into 4 selections and add the edges back one section at a time.
When making the selections, it is best to view the original image. In the EZ green Screen software user interface, select "Original" under the preview. After you make the selection, then select "Add to BG - no Spill Correction". This will add the area to the FG. It will then switch the view to transparency. You will want to select "Original" view again before making each selection.
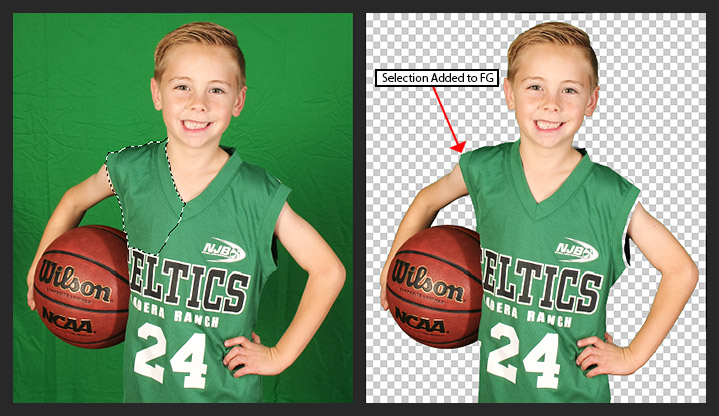
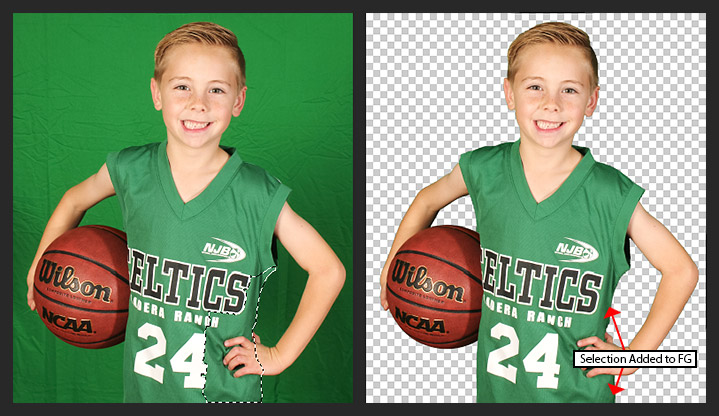
For the first selection, use either the lasso or polygon lasso tool. Then select the middle area. Get as close to the edges as you can do quickly without selecting any of the green screen. Once the selection is made, click the "Add to FG - No Spill Correction" button. The software will then automatically update the foreground mask and spill correction mask.

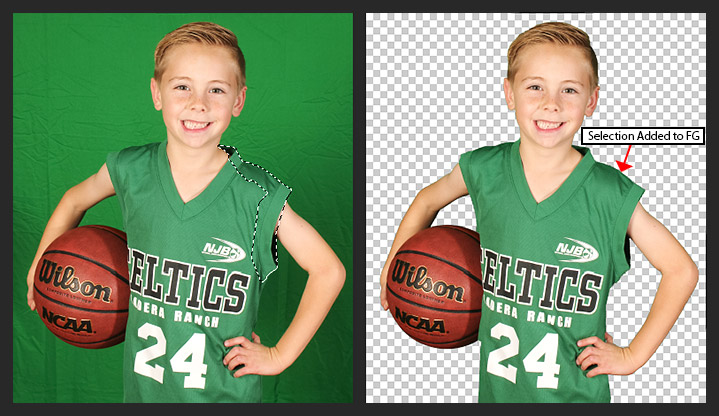
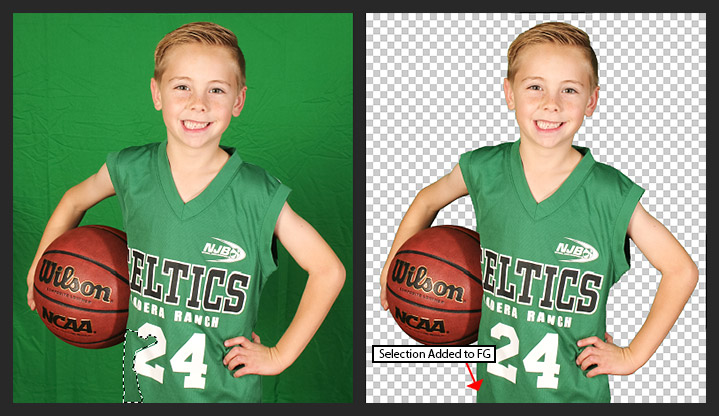
After the middle section is added to the FG, then decide what areas to do next to add the shirt edges into the foreground. It is often easiest to break the image out into several smaller sections. You can decide exactly how you want make the selection. In this example, 4 selection were made to capture the shirt edges.
For the edges, it is best to use the quick select, magic wand, or magnetic lasso tool. After the selection is made the it often helps to use the feather tool so the edges are not so sharp. A value of 0.3-0.5 pixels for a feather is usually enough to soften the edges. After each selection is made, add it to the foreground the same way. Then select "Original" in the preview before making the next selection.
© Pixnub Software